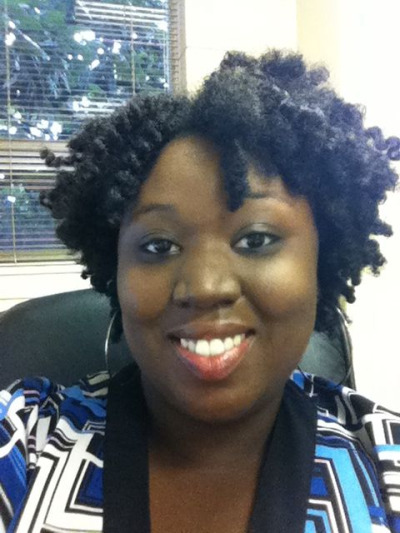
Today at lunch I got a question I haven't heard in a long time, not since I cut my hair into a bob almost two years ago. The girl at the counter asked, "Is that your real hair?" I can't lie, that lil comment made me smile, like "Yes! I got it back!" But then came the other comment... "Oh, you got that good hair."
-_-
I don't know what to do with this comment. I can't really be mad at someone for saying this; after all, they are trying to give me a compliment. But "good" hair implies that there is such a thing as "bad" hair, which simply isn't true. There are different textures, some which appeal more (to some people) than others or may seem easier to handle. But "good" is determined by the quality of care. Anyone can have "good" hair if they learn what their hair needs and not attempt to do things that should be done by professionals (coloring, relaxing, etc.) on their own/without consultation.
Of course, I can't go into this little shpeel every time someone makes the comment. Usually I just smile awkwardly and say thanks....
Do you say anything when you hear "good/bad hair" comments, or do you tend to let it slide? If you do speak up, what do you say? Let me hear your thoughts. Maybe I'll have something to come back with next time!
Monday, February 28, 2011
Tuesday, February 22, 2011
Buying Into (and Out Of) the Beauty Myth
For the longest, I felt like there was a hierarchy of beauty. It was never explicitly stated, but the attitudes and actions of those around me lead me to this belief. It was always:
1. pretty light-skinned with long hair
2. pretty light-skinned
3. light-skinned with long hair
4. light-skinned
5. dark-skinned with long hair
6. dark-skinned
From childhood, I knew I was near the bottom of the totem pole. Then in high school/college big booties got thrown in the mix and I was even lower. According to the messages I received, my saving grace was my thick long hair. I may not have been pretty (because everyone knew dark-skinned girls couldn't be pretty!) but at least I had "good hair" that would cause someone to look my way... unless, of course, the light-skinned girls they looked at first were interested...
Somewhere along the way, I want to say in college, I shook the notion that the only desirable thing about me was my hair. Yes, I still had it long and kept it silky smooth with a perm but I begin to believe in the other aspects of my own beauty. Inner and outer. Amazingly, when I opened my eyes to the truth, I realized that others saw it too. I wasn't alone! Yes, dark-skinned girls could be cute. Yes, even the ones without a big ol booty. And yes, I was one of them! Yes, Virginia, there IS a Santa Claus!!
O_O Okay, maybe not the last one; I got caught up in the moment.
My point is this: we've all been fed nonsense about what constitutes beauty. Whether it was from family, the media, significant others... Some of us absorbed more of that thinking than others, but it doesn't mean that you have to continue to buy into that. Regardless of your skin tone, hair texture (or how you wear it), size, whatever... if you don't see the beauty in yourself, you can't expect the world to do it. Yes, we've been bombarded with the European "standard" of beauty, but it's a myth! There is no "standard" of beauty. Hello, "beauty is in the eye of the beholder!" Learn to love what you see in the mirror (even if you want to tweak some things), whether or not it fits other people's definition of beauty.
Wednesday, February 9, 2011
Tori's Tips for Terrific Twistouts
To have a great twistout, you have to start with great twists! It's been a year since I started doing my own hair, and the first style I attempted was two-strand twists and the subsequent twistout. Over time, I've developed my own little method for perfecting the twistout.
1. Twist on dry or semi-dry hair, not wet
I kinda stumbled across this, but I swear it's made all the difference in my twists and twistouts. When I first started doing my two-strand twists, I did them right after washing while they were still wet. Doing this kept me from getting the most out of my twists for two reasons: 1. I couldn't correctly estimate how much hair I was using, so I ended up with fewer, fatter twists than I wanted, and 2. I wasn't ready for how the twists shrank once they dried. On top of that, it took forever for the hair to dry! Now I usually do my twists when my hair is completely dry. If I want to do it after washing, I'll let it air dry about 85% if I have time, or if I'm in a rush I'll spray it with heat protectant and sit under the dryer for a few minutes.
2. Keep your twistout style in mind when deciding the twisting pattern/parts
Instead of just twisting willy-nilly and waiting to see what happens, have a picture in mind of how you want your hair to look. This is more so for the front of your hair than the back. Will it all go straight back? Parted down the middle? The way you part your hair and the direction of the twists will determine how your twistout looks for at least a day or two so keep that in mind.
3. For a "big" twistout, wear twists longer
This is something that I just learned when I did my last twistout a few weeks ago. When I wear my twists only for a day or two, my twistouts are generally smooth, sleek, and not as big. It took a few days of wearing the twistout to get the big hair, but by then I was losing definition. However, this last time I wore the twists for four days. Even with the conditioner and wearing my bonnet at night, I could see the twists starting to puff up. (They were also a little frizzy from the weather). Once I took the twists down, I was amazed at the difference. Three-day twistout hair on day one! So if you're going for a sleek twistout, 1 or 2 days should do; go longer if you want to go bigger.
4. Seal twists with an oil
When I first started doing twists, I used Cantu Shea Butter to seal them. I thought this would give them shine and hold. Not so much. What did give them surprising hold and a good deal of shine was a mix of coconut and olive oil. You may want to experiment with different essential oils to find what you like best, but I would encourage you to incorporate an oil into your twists, especially on the ends.
5. Keep your twists conditioned and scalp well oiled
Just because twists are considered a protective style, that doesn't mean you don't have to do anything! Get a good spray leave-in conditioner such as Carol's Daughter Black Vanilla and get a hit daily. Your hair will thank you! And don't forget your scalp, because you can't have healthy hair without a healthy scalp. Apply your favorite oil to make sure it stays moisturized, especially during the winter. My favorite product for my scalp is We Rock Roots Rock Therapy, though I can also be found resorting to Sulfur 8 from time to time. What can I say? It works for me...
6. Trim your ends before unraveling twists
I haven't been doing this, but I did it on Sunday when I washed my hair and did a chunky twistout. Trimming the old, thin ends of the hair gave it a cleaner, more shapely look. Usually my twistout would include a little haze of random ends shooting out everywhere, looking frizzy and a bit unsightly. Considering that I was about due for a trim anyway, I decided to go ahead with it myself. That extra five minutes made a world of difference for me. This is also the easiest way to dust your hair, IMO.
What are your fool-proof tips for a great twistout? Speak on it!
 |
| end of January |
I kinda stumbled across this, but I swear it's made all the difference in my twists and twistouts. When I first started doing my two-strand twists, I did them right after washing while they were still wet. Doing this kept me from getting the most out of my twists for two reasons: 1. I couldn't correctly estimate how much hair I was using, so I ended up with fewer, fatter twists than I wanted, and 2. I wasn't ready for how the twists shrank once they dried. On top of that, it took forever for the hair to dry! Now I usually do my twists when my hair is completely dry. If I want to do it after washing, I'll let it air dry about 85% if I have time, or if I'm in a rush I'll spray it with heat protectant and sit under the dryer for a few minutes.
2. Keep your twistout style in mind when deciding the twisting pattern/parts
Instead of just twisting willy-nilly and waiting to see what happens, have a picture in mind of how you want your hair to look. This is more so for the front of your hair than the back. Will it all go straight back? Parted down the middle? The way you part your hair and the direction of the twists will determine how your twistout looks for at least a day or two so keep that in mind.
3. For a "big" twistout, wear twists longer
This is something that I just learned when I did my last twistout a few weeks ago. When I wear my twists only for a day or two, my twistouts are generally smooth, sleek, and not as big. It took a few days of wearing the twistout to get the big hair, but by then I was losing definition. However, this last time I wore the twists for four days. Even with the conditioner and wearing my bonnet at night, I could see the twists starting to puff up. (They were also a little frizzy from the weather). Once I took the twists down, I was amazed at the difference. Three-day twistout hair on day one! So if you're going for a sleek twistout, 1 or 2 days should do; go longer if you want to go bigger.
4. Seal twists with an oil
When I first started doing twists, I used Cantu Shea Butter to seal them. I thought this would give them shine and hold. Not so much. What did give them surprising hold and a good deal of shine was a mix of coconut and olive oil. You may want to experiment with different essential oils to find what you like best, but I would encourage you to incorporate an oil into your twists, especially on the ends.
5. Keep your twists conditioned and scalp well oiled
Just because twists are considered a protective style, that doesn't mean you don't have to do anything! Get a good spray leave-in conditioner such as Carol's Daughter Black Vanilla and get a hit daily. Your hair will thank you! And don't forget your scalp, because you can't have healthy hair without a healthy scalp. Apply your favorite oil to make sure it stays moisturized, especially during the winter. My favorite product for my scalp is We Rock Roots Rock Therapy, though I can also be found resorting to Sulfur 8 from time to time. What can I say? It works for me...
6. Trim your ends before unraveling twists
I haven't been doing this, but I did it on Sunday when I washed my hair and did a chunky twistout. Trimming the old, thin ends of the hair gave it a cleaner, more shapely look. Usually my twistout would include a little haze of random ends shooting out everywhere, looking frizzy and a bit unsightly. Considering that I was about due for a trim anyway, I decided to go ahead with it myself. That extra five minutes made a world of difference for me. This is also the easiest way to dust your hair, IMO.
What are your fool-proof tips for a great twistout? Speak on it!
Tuesday, February 1, 2011
Make-up Break Pt. I
Lately *well, it was lately when I started this post... in November* I've been on a makeup/tool shopping spree (which is about to be halted unless I can find a sponsor LOL) and I've had some hits... and some misses. My focus has been mostly on the eyes. They say the eyes are the window to the soul right? Well what's a window without some beautiful treatments? :)


from the site:
I think my expectations for this was a bit off. I assumed that a primer automatically meant that it would make my shadow colors really pop. I didn't really get that, or at least not how I expected. It didn't make much difference on my lid, but under the brow it did too much. Gave me a very clownish look. No bueno. I also have issues with application. Maybe it's just that I'm not used to it, but the brush totally threw me off. I ended up with too much in some places, not enough in others. Definitely a hassle when trying to get out the door in a hurry. However, this primer is not without merit. It kept my shadow from wearing off, which is great considering that I'm usually on the go from the time I put it on in the morning. I'll continue to use primer, but I don't think I'll be dropping another $18 a pop on this one. In the meantime, I'll be adding NYX Jumbo Eye Pencil in Milk to my artillery. According to what I've been reading/YouTube videos, that is THE thing to have to make those colors stand out. We will see!
From the site:
I had no real reason for buying this. It was an impulse buy. I was in Wal-Mart and said "oooh pretty colors!" and got it. I was surprised to see that they were cream shadows. Seeing this, I figured, "I bet these colors really pop!" Um, not so much.I had to put a ton of it on to see it, but then that meant creasing. The colors looked great in the packaging but on me they looked rather dull and blah. I think they would be awesome on someone with light skin, but they just didn't do it for me. Not even with the primer. I'm torn because I want to try some other shades but I don't want to be disappointed! The pallets I'm really feeling are Black Magic, Wild Orchids (although I probably won't try it since it looks a lot like Va Va Va Bloom), Precious Metals, Copper Canyon, and Twilight. I can't remember how much it was (my bad) but I don't believe it was more than $8. And since it was cheap, I may have to hunt down the Black Magic and give Revlon a second chance.
1. Eco Tools Bamboo 6-piece Eye Brush Set
From the site:I picked this up for three reasons: it was cute, it was cheap, and I was tired of using the little sponge applicators that come with eyeshadow. My favorite thing about these brushes? On the handle it states which brush it is. That is great for a make up novice like me, because I wouldn't know the smudge brush from the shade brush, the crease from the highlight, and I'd be blending with whatever I grabbed. Although I don't have any other brushes to compare them to, they are a win in my book. The application is a lot easier and better than with the sponges, and at about $7.00 at Walgreens, they didn't hurt my pocket so I'm more likely to go with these than the expensive designer brushes I've seen.
THIS EARTH-FRIENDLY SET SHOWS RESPECT FOR THE PLANET:Highly sustainable bamboo handles100% cruelty-free, soft taklon bristlesRecycled aluminum ferrules
Labeling the brushes made this an instant win! Natural cotton and hemp cosmetic bagReusable storage pouch

2. Urban Decay Eyeshadow Primer (shade: Sin)
from the site:
This miracle eyeshadow primer is unmatched by any other in the beauty industry! The genie in this bottle fulfills three wishes: eyeshadow that lasts, more vibrant and lasting color, and absolutely NO creasing. Apply Primer Potion to lids before shadow application. It dries down almost instantly (and invisibly), creating smooth lids that are super powered eyeshadow magnets.
The formula is full of silicone, which you beauty mavens know makes for a smooth and silky application. Packaged in a pretty genie bottle, our Potion applies with a magic wand and flocked applicator.
I think my expectations for this was a bit off. I assumed that a primer automatically meant that it would make my shadow colors really pop. I didn't really get that, or at least not how I expected. It didn't make much difference on my lid, but under the brow it did too much. Gave me a very clownish look. No bueno. I also have issues with application. Maybe it's just that I'm not used to it, but the brush totally threw me off. I ended up with too much in some places, not enough in others. Definitely a hassle when trying to get out the door in a hurry. However, this primer is not without merit. It kept my shadow from wearing off, which is great considering that I'm usually on the go from the time I put it on in the morning. I'll continue to use primer, but I don't think I'll be dropping another $18 a pop on this one. In the meantime, I'll be adding NYX Jumbo Eye Pencil in Milk to my artillery. According to what I've been reading/YouTube videos, that is THE thing to have to make those colors stand out. We will see!
3. Revlon Illuminance Creme Shadow (shade: Va Va Va Bloom)
 |
| Note: this is NOT Va Va Va Bloom. This is Black Magic, the one I really want to try. |
From the site:
Discover an endless spectrum of luminosity. Play with all 4 shades and watch your eyes light up a new way every time!
 |
| Va Va Va Bloom. I have no idea why this thing wont let me turn the picture right side up! :-/ |
Subscribe to:
Posts (Atom)