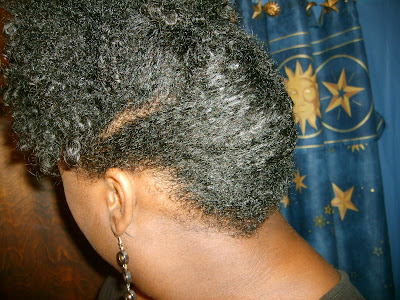
To have a great twistout, you have to start with great twists! It's been a year since I started doing my own hair, and the first style I attempted was two-strand twists and the subsequent twistout. Over time, I've developed my own little method for perfecting the twistout.
 |
| end of January |
1. Twist on dry or semi-dry hair, not wet
I kinda stumbled across this, but I swear it's made all the difference in my twists and twistouts. When I first started doing my two-strand twists, I did them right after washing while they were still wet. Doing this kept me from getting the most out of my twists for two reasons: 1. I couldn't correctly estimate how much hair I was using, so I ended up with fewer, fatter twists than I wanted, and 2. I wasn't ready for how the twists shrank once they dried. On top of that, it took forever for the hair to dry! Now I usually do my twists when my hair is completely dry. If I want to do it after washing, I'll let it air dry about 85% if I have time, or if I'm in a rush I'll spray it with heat protectant and sit under the dryer for a few minutes.
2. Keep your twistout style in mind when deciding the twisting pattern/parts
Instead of just twisting willy-nilly and waiting to see what happens, have a picture in mind of how you want your hair to look. This is more so for the front of your hair than the back. Will it all go straight back? Parted down the middle? The way you part your hair and the direction of the twists will determine how your twistout looks for at least a day or two so keep that in mind.
3. For a "big" twistout, wear twists longer
This is something that I just learned when I did my last twistout a few weeks ago. When I wear my twists only for a day or two, my twistouts are generally smooth, sleek, and not as big. It took a few days of wearing the twistout to get the big hair, but by then I was losing definition. However, this last time I wore the twists for four days. Even with the conditioner and wearing my bonnet at night, I could see the twists starting to puff up. (They were also a little frizzy from the weather). Once I took the twists down, I was amazed at the difference. Three-day twistout hair on day one! So if you're going for a sleek twistout, 1 or 2 days should do; go longer if you want to go bigger.
4. Seal twists with an oil
When I first started doing twists, I used Cantu Shea Butter to seal them. I thought this would give them shine and hold. Not so much. What did give them surprising hold and a good deal of shine was a mix of coconut and olive oil. You may want to experiment with different essential oils to find what you like best, but I would encourage you to incorporate an oil into your twists, especially on the ends.
5. Keep your twists conditioned and scalp well oiled
Just because twists are considered a protective style, that doesn't mean you don't have to do anything! Get a good spray leave-in conditioner such as
Carol's Daughter Black Vanilla and get a hit daily. Your hair will thank you! And don't forget your scalp, because you can't have healthy hair without a healthy scalp. Apply your favorite oil to make sure it stays moisturized, especially during the winter. My favorite product for my scalp is
We Rock Roots Rock Therapy, though I can also be found resorting to Sulfur 8 from time to time. What can I say? It works for me...
6. Trim your ends before unraveling twists
I haven't been doing this, but I did it on Sunday when I washed my hair and did a chunky twistout. Trimming the old, thin ends of the hair gave it a cleaner, more shapely look. Usually my twistout would include a little haze of random ends shooting out everywhere, looking frizzy and a bit unsightly. Considering that I was about due for a trim anyway, I decided to go ahead with it myself. That extra five minutes made a world of difference for me. This is also the easiest way to
dust your hair, IMO.
What are your fool-proof tips for a great twistout? Speak on it!


